Featured
Showing posts with label Box Tutorial. Show all posts

Wednesday, 16 April 2014

Mixed media gift box with Handmade Flowers

Hello crafters...
Its super summer time ... And what best the time can be utilized in, other than crafting at home with AC on... ;)  :)  .... Today I will be sharing with you is a super hot technique that mostly crafters are following these days.. Yess.. its Mixed media...
Well I am going to discuss few very simple and easy to perform steps to attain a mixed media look in your projects.. Though mixed media in itself is a world of techniques, but by just performing the following 5-6 steps u get that look...  Here I am in the making of a gift box or a chocolate box made of cardboard..

First step is to apply GESSO generously on the box..
Then  spray colors with any colorant Inks of your choice.. you may go for alchohol Inks, distress inks or the ones I have chosen for my project ie Ranger dylusions inks..  Use water for merging inks...
Our Mini Mister  at Color conceptions online store does wonders when it comes to spraying water...


Next step is to take your favorite Stencils and Modelling paste.. Here I have used Crafter's Workshop templates Bricks, Art is definition... 
You may use a heat gun to dry fast... 


Next Step is to decide embellishments to use , and no mixed media project is complete without more n more textures.. So you may use cheese cloth, corrugated sheets, burlap pieces, Laces etc at places...
Embellish with Flowers, Leaves, Charms , laces ,etc...


And Tadaaa... Here's the finished project... I just love the colors.. these pastels are so soothing for our eyes in this bright summers... Don't forget to apply a very thin damp- dry coat of brush over all flowers and embellishments, eventually.. to give it a distinctive look... 


Well this is not all... 
All the roses are handmade..   And below is a video tutorial on how I made these beauties..
Die cut Sizzix Tattered Floral medium size 5 flowers.. 


Hope you all enjoyed this tutorial, I enjoyed making it.... 
Thanks for stopping by, do share your love n comments..
Now get inspired and join in in our current month challenge - Anything but Card


Thursday, 23 January 2014

Secret / Magic Box Tutorial


Hello everyone!!!

This is Charu from Crafted Creations . Hope everyone's at their highest crafting spirits in this first month of the new year.
Today I am going to share a picture tutorial on
How to make a Secret Box / Magical Box
Remember this one, I made as inspiration for you all for our this month's challenge 3-Bs..

So lets start...

You will need five pieces of card stock, one- 6" by 10 1/2 ",
one 7" by 10 1/2 ", three pieces 5 5/8" by 5 5/8 "


Step 1 - Place the 6" x 10 1/2" card stock on your scoreboard with the short side along the top and score at 3". and then  Rotate the card stock so the long side is along the top and score at 3" and 7 1/2".


Step 2 - At one corner of the card stock, score diagonally by lining up the corners along one of the inch grid line on your scoreboard.


 Step 3 -   Score also at 1" away from the first scoreline.   Do same scoring at the 
other corner also (same side of the card stock )..


Step 4 - Trim off the small corner triangle. Both corners as you can see in below picture. 


Step 5 - Cut the triangles at the other side also.   


Step 6 - Cut along the horizontal scoreline up-to the vertical scorelines at both sides. Refer the Picture below. Your card stock should look like this.


Step 7 - Now fold along all the scorelines.


Step 8 - Apply glue all over the corner piece that has the flap as show below.


Step 9 - Stick the opposite triangles one on other to form a corner. And fold the flap inside.  


Now its turn for the other card stock which 
is 7" by 10 1/2 "

Step 10 - Place the 7" x 10 1/2" card stock on your scoreboard with the short side along the top and score at 3" and 6".  That extra 1" of paper is for the connecting flap.
Repeat all steps further up to step five. You get a similar shaped cardstock except that extra 1" flap which will be used as a connector..  


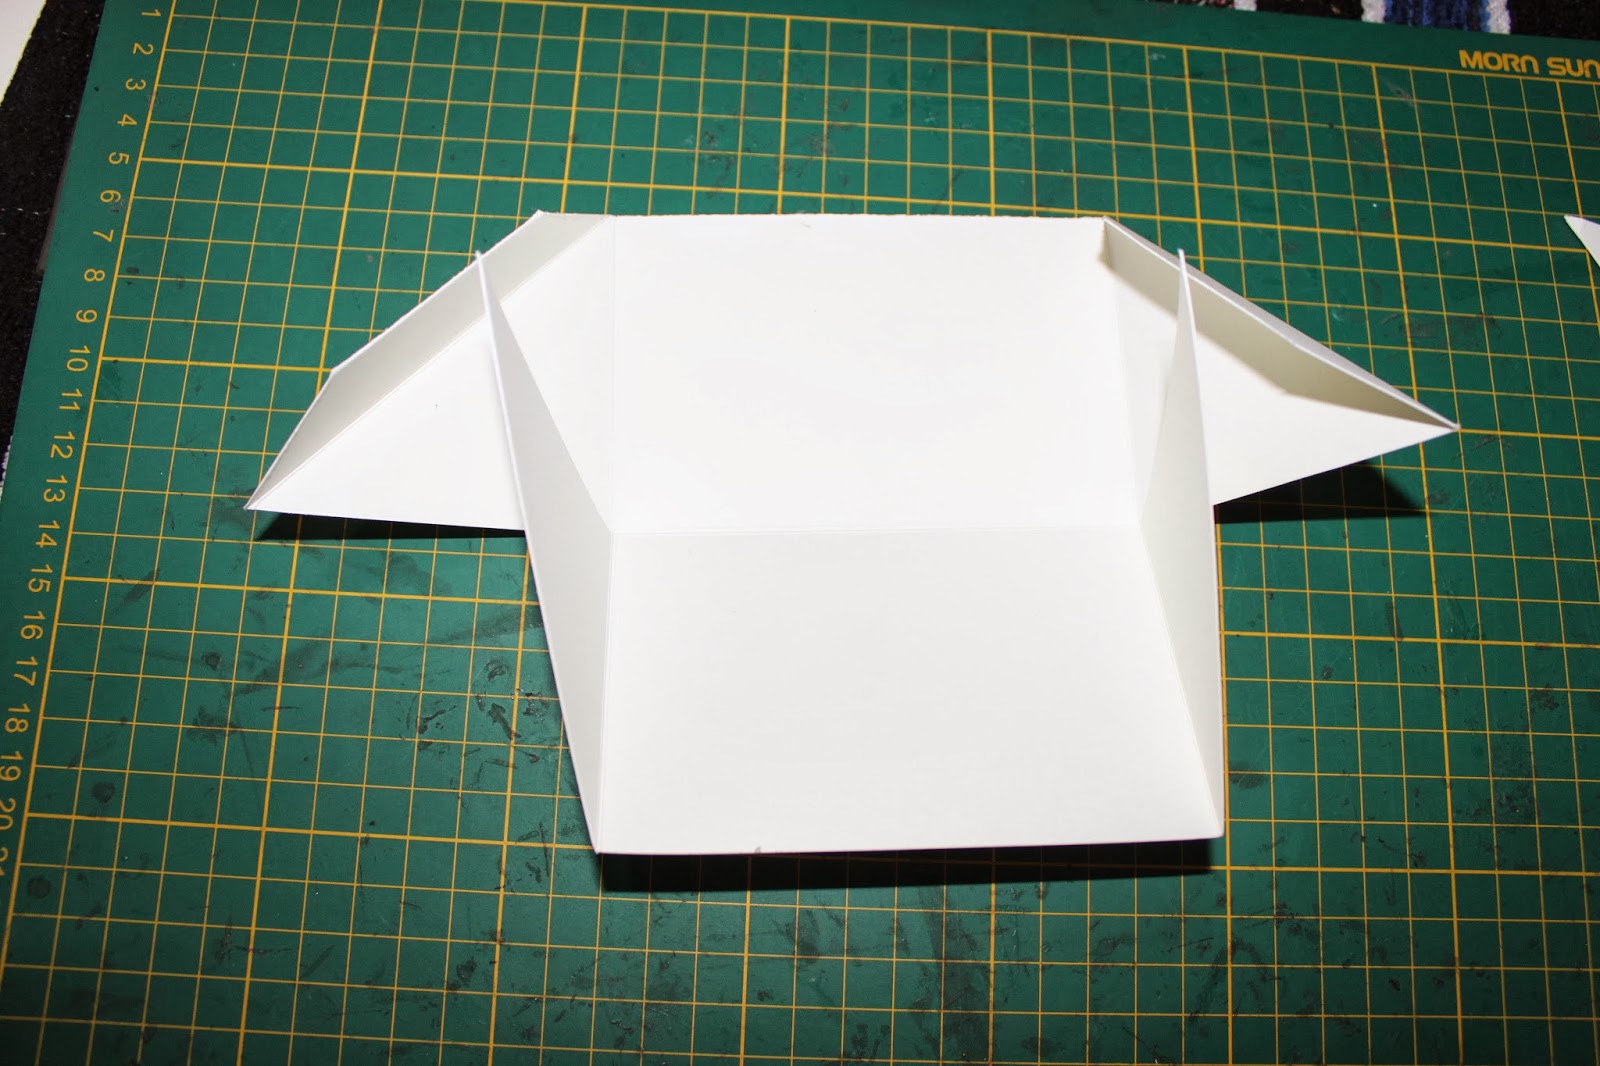
Step 11 - After doing the same procedure you get the second part of the box like shown in the picture below.


Step 12 - Now connect both the parts of the box by applying glue on the flap.


You get this...


Now its turn for the trays..

 Take your 5 5/8" x 5 5/8" card stock and score at 1 3/8 " at all the sides. 
And cut along one side score line at each corner.


Glue the flaps and form the tray container.. Make all three similarly.


Now stick all three trays inside the box by applying the glue at two sides of the tray.for the bottom most tray you can apply glue at the base of the box.


And .. Taddaaaa... Your Secret Box is ready ...  Decorate it to your accordance..


I had decorated mine ... And here's the finished look...  :)
Tilda is colored using Tim Holtz distress markers and those lovely flowers
 are hand made by me... :)


All the material variety used to make this Secret Box is available at 
Hope this tutorial is of some use to you.. Njoiii Crafting !!!

Please do not forget to participate in this month's challenge
 3 - Bs, Bag Box 'n Basket.
Thank you !!


Monday, 20 January 2014

Box Tutorial with a Single Sheet

Hello Friends...

This is Nupur here & today I am going to share a small & simple video tutorial with you all...

This tutorial will show you how you can make a 3"x3" box with a single sheet of cardstock, some scored lines & little cutting.

I have decorated the box with Love &  Valentines day theme...


The box is opened by untying the ribbon...


There are 2 small pockets inside each of the lid flaps...


I have added few cute little love theme tickets inside the pockets..


Here is the video tutorial to make this fast & easy box..


P.S. : This is my first attempt at video tutorial & I have made some mistakes.. I don't know how some parts of the video went out of focus & got blurred during the shooting of this video.. Sorry for that... please bear with me... 


Products used:

Worn Lipstick Distress Ink
Black Memento Dew Drop
MS Doily Punch
Just Rite Clear Stamps
MS Score Board
Cutting Mat
Blending Foam
Acrylic Block

P.S. : Have you participated in our ongoing challenge 3B's : Boxes, Bags, Baskets ???


Thank you for visiting...
Copyright © 2015 The Craft Shop
| Distributed By Gooyaabi Templates