Featured
Showing posts with label Tutorial. Show all posts

Sunday, 20 September 2015

How to use EzMount for Rubber Stamps

Hello Everyone,
Shilpa here,

Today I would like to share with you my experience with Ez mounted Rubber stamps. Many of you know I love my stamps and specially rubber stamps with artsy designs. Priya's shop The Craft Shop has got fabulous collection of stamps, you can check them all here. 

Have you noticed some of the rubber stamps are 'unmounted' ..what does that mean.. they are not mounted on cling foam.
Crafty Individuals, Designs by Ryn...these stamps are under this category.
Either you can use them sticking on acrylic block with adhesive or you can use EZ Mount


EZ Mount comes in 8.5*11" sheet
I recently bought this and I am loving it!! 

here is small tutorial how to mount your rubber stamps on cling EZMount foam.

First Without mounting them, I stamped my butterflies using Jet black Archival Ink(for our future reference) .


Cut all the designs as closely as possible.


There are two sticky sides to EZ Mount foam. Use the one with instructions written on it.


Cut the foam according to the size of stamps.


Peel off the white text paper and stick stamp on it.


Cutout the side foam close to rubber stamp as much you can. Tim holtz Non-stick scissor works best for this.

I stamped butterfly images after adhering EZ Mount foam
here you will find clear difference.


Yes, with EZMount Cling foam stamp gives crisp image.

I feel this is very good investment for Stampers.
Do try it...you can buy them here.

Thanks so much for stopping by.


Sunday, 14 June 2015

Dream Canvas with Tutorial

Hello Everyone,

Shilpa here,

Today I've mixed media canvas to share with you.


And here is the process:


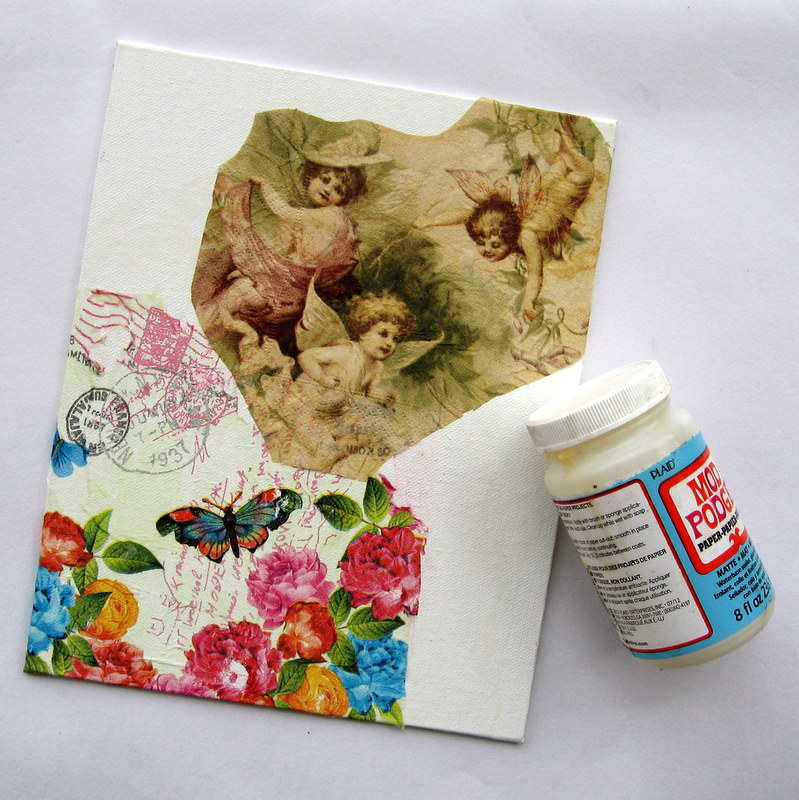
I adhered 2 Decoupage napkins to canvas with Modge Podge Matt.


Next applied Gesso for whole canvas and stenciled texture with Modelling paste.


To color the canvas I used distress paints.


When everything dried completely, I applied thin layer of Inka Gold- Old silver color for the raised areas and embellishments.


When I arranged all embellishments my canvas was ready.

Thanks so much for stopping by, for more mixed media inspiration visit my blog Neon diary


Wednesday, 16 April 2014

Mixed media gift box with Handmade Flowers

Hello crafters...
Its super summer time ... And what best the time can be utilized in, other than crafting at home with AC on... ;)  :)  .... Today I will be sharing with you is a super hot technique that mostly crafters are following these days.. Yess.. its Mixed media...
Well I am going to discuss few very simple and easy to perform steps to attain a mixed media look in your projects.. Though mixed media in itself is a world of techniques, but by just performing the following 5-6 steps u get that look...  Here I am in the making of a gift box or a chocolate box made of cardboard..

First step is to apply GESSO generously on the box..
Then  spray colors with any colorant Inks of your choice.. you may go for alchohol Inks, distress inks or the ones I have chosen for my project ie Ranger dylusions inks..  Use water for merging inks...
Our Mini Mister  at Color conceptions online store does wonders when it comes to spraying water...


Next step is to take your favorite Stencils and Modelling paste.. Here I have used Crafter's Workshop templates Bricks, Art is definition... 
You may use a heat gun to dry fast... 


Next Step is to decide embellishments to use , and no mixed media project is complete without more n more textures.. So you may use cheese cloth, corrugated sheets, burlap pieces, Laces etc at places...
Embellish with Flowers, Leaves, Charms , laces ,etc...


And Tadaaa... Here's the finished project... I just love the colors.. these pastels are so soothing for our eyes in this bright summers... Don't forget to apply a very thin damp- dry coat of brush over all flowers and embellishments, eventually.. to give it a distinctive look... 


Well this is not all... 
All the roses are handmade..   And below is a video tutorial on how I made these beauties..
Die cut Sizzix Tattered Floral medium size 5 flowers.. 


Hope you all enjoyed this tutorial, I enjoyed making it.... 
Thanks for stopping by, do share your love n comments..
Now get inspired and join in in our current month challenge - Anything but Card


Saturday, 5 April 2014

Creating Miniatures

Hello friends,

I hope you are enjoying our new challenge : Anything But Cards.
The results for our February challenge Glam with Glitter will be announced soon  :)

Have you ever tried making miniatures...  like miniature books, posters, iPhone, etc...
They are super fun to make & sometimes a bit brainstorming and a lot of trial & error is needed to create that perfect little, cute miniature... 
I am a bit of perfectionist when it comes to art & craft... so I tend to discard all the pieces that I don't look perfect to me..
So I amhere to share a few of the miniatures that I have made recently.... I don't have the WIP pix but I will try to explain the process...
Lets start with the easiest one... In the above pic I have made miniature movie posters... 
These are very simple.. just open google, search & save the movie poster that you like, open it in any image editing software, resize it, print it on good quality heavy weight cardstock & trim it around the edges...
Now you can leave it at that or go a step further to create the shine..
To achieve the glossy finish you can either use a photo paper to print the image or  heat emboss it.
To heat emboss simply take any watermark ink like Versamark & cover the whole image with it , pour some clear embossing powder on top, shake off the excess & melt the powder with your heat tool ( work quickly here or the image can bleed). 
I have made the book covers here in the same way.. & adhered them to small white paper boxes to look like books
 Now this one is a little complicated if you don't know photoshop or some similar software... I searched some iPhone icons & background on google & then designed this iPhone in photoshop. To add a little more detail I modified the calendar icon to show the date & day of the recipient's birthday. Rest of the process is similar to making the movie poster.

In the above picture I have made a miniature camera from scratch... When I was asked to add a camera to this explosion box I had no idea what I should do...I just  said I will figure something out...
At first I was a bit confused & asked few friends for suggestions... I had no camera die, the die that was available for camera was either too big or too small, the camera charm that I had was way to small & same was the case with other embellishments that I found online... So at last I decided to make it myself from cardstock... & I am glad that I did... The requirement was also for a 3D camera not a flat cut out or printout.... So I added 5 layers to create it... I drew all the 3 base layers by hand & cut it with scissors... Next I die cut one circle & one ring with the smallest circle dies that I had to make the lens... Then I took my versamark ink & black embossing powder & heat embossed all of my pieces.... For the textured layer I melted the powder & quickly flipped it down om my textured silicon mat... I let it cool down before removing... & I had my texture  :)
The last thing I did was assembling all the layers on top of each other using black foam tape & adding a piece of black satin ribbon at the back as the camera strap..

So these are a few tips to make miniatures... Miniatures look adorable & the tiny details add to their realistic look... So look around, observe & find new & innovative ways to create life like miniatures from the tools & materials that you already have...
I hope you enjoyed my methods to make miniatures... 
Thank you for sticking till the end of such a lengthy post... see you soon...

Supplies Used:


Monday, 24 March 2014

More Techniques to Use Glitter

Hello everyone..
This is me ( CHARU ) , again to show you some more techniques of using your glitters.. Before I proceed further on this topic, I wanna remind you all of our Challenge this month.. Glam with Glitter .. Don't forget to use your glitter in unique way and participate to win..

Moving further on the techniques of using glitter...
I will today show you all how you can simply use your Glitter with Mod - podge, to create wonders in your crafting..
I actually mixed my Red glitter powder from  The Craftshop with equal parts of mog podge and applied directly on my MDF objects to give them a glittery, glamorous and shiny coated look.. Believe me this saves me time ( i dont have to first stick patterned paper, then coat with mod podge and then keep waiting for all that to dry).. and this saves me some patterned paper too..  ;) ... I can apply the same mixture on old footwear too , to give them an absolutely new look.. remember my inspiration project for you all this month..

and here are the pictures...


Next technique ...
Mix mod podge and glitter in equal parts,  and then add baby powder to thicken the paste...
Use this mixture as modelling paste to create glittered stenciled patterns.. I used green glitter with mod podge and baby powder to create borders at various places, plain card stock  or patterned paper ...
Here are the pics...


Hey !! did you recognize the border... Its martha stewart doily heart lace punch.. I used it as stencil to create these borders... :)  Hope you all liked the techniques ... 
Thank you for your time and love..  :)


Friday, 7 March 2014

Glitter with Stencil

Hello friends...

Nupur here from Nupur Creatives...
I hope you all are having fun with our new Glam With Glitter Challenge...
Today I am going to share a glitter technique with you all..
Stencils are in trend right now...  & today we are going to combine glitter with stencils to create beautiful & glittery backgrounds...

I saw this technique on Jennifer Mcguire's blog and I loved the results... 

Lets get started...
Here are the materials we are going to need for this technique:
  • Sticker sheet/ adhesive backed sheet
  • Versamark Ink pad
  • Stencil
  • bone folder (optional)
  • glitter in 2 or more contrasting colors
  • scrap piece of paper to catch the excess glitter


take the stencil & rub versamark ink pad on the side that will be facing the sticker sheet.
This will prevent the stencil from adhering to the sticker sheet permanently

Remove the paper backing from the sticky part of the sticker sheet ( don't throw the backing paper, we will be using it in the next few steps).
The sticker sheet is thin so I have cut it slightly larger than the stencil & attached it to a thick card stock with some masking tape (the sticky side should be facing up). Now place the stencil (versamark side face down) on top of the sticker sheet.


Now take the backing paper & place it on top of the stencil ( shiny side facing the stencil) & burnish it nicely... there should be no gaps between the stencil & the sticker sheet otherwise the glitter will slip under the stencil & the resulting image won't be crisp.
I have used  my bone folder for this step but if you don't have it then you can use a similar tool or even your fingers...

Now remove the backing paper & pour glitter all over the stencil & remove the excess by gently tilting it & tapping on the back a few times...

Now again take the backing paper & burnish the glitter in the exposed adhesive of the sticker sheet...

Take a soft bristle brush or a baby wipe to remove all the loose glitter from the stencil...
 Gently peel off the stencil from the sticker sheet... take care not to tear the sticker sheet during this step...

Now pour the 2nd color of glitter on top & remove the excess.

Again take the backing paper & burnish the glitter..
Burnishing also gives the glitter a slightly velvety finish.

Now your glittery background is ready to be used..  :)

You can also die cut this glitter paper & use it as accents.

Here is a card I made with it... 
(Please excuse the design & photography as I assembled it in a real hurry before leaving for my holidays )

For the butterfly & the border I die cut both of them & adhered them on sticker sheet & trimmed off extra sticker sheet... next I poured the glitter on top & burnished it.. so the negative space of the die cut was glittered... to match the glittered paper bckground...

I hope you will try out this technique & join us in our current challenge.


Supplies Used:

Glitter


Thursday, 23 January 2014

Secret / Magic Box Tutorial


Hello everyone!!!

This is Charu from Crafted Creations . Hope everyone's at their highest crafting spirits in this first month of the new year.
Today I am going to share a picture tutorial on
How to make a Secret Box / Magical Box
Remember this one, I made as inspiration for you all for our this month's challenge 3-Bs..

So lets start...

You will need five pieces of card stock, one- 6" by 10 1/2 ",
one 7" by 10 1/2 ", three pieces 5 5/8" by 5 5/8 "


Step 1 - Place the 6" x 10 1/2" card stock on your scoreboard with the short side along the top and score at 3". and then  Rotate the card stock so the long side is along the top and score at 3" and 7 1/2".


Step 2 - At one corner of the card stock, score diagonally by lining up the corners along one of the inch grid line on your scoreboard.


 Step 3 -   Score also at 1" away from the first scoreline.   Do same scoring at the 
other corner also (same side of the card stock )..


Step 4 - Trim off the small corner triangle. Both corners as you can see in below picture. 


Step 5 - Cut the triangles at the other side also.   


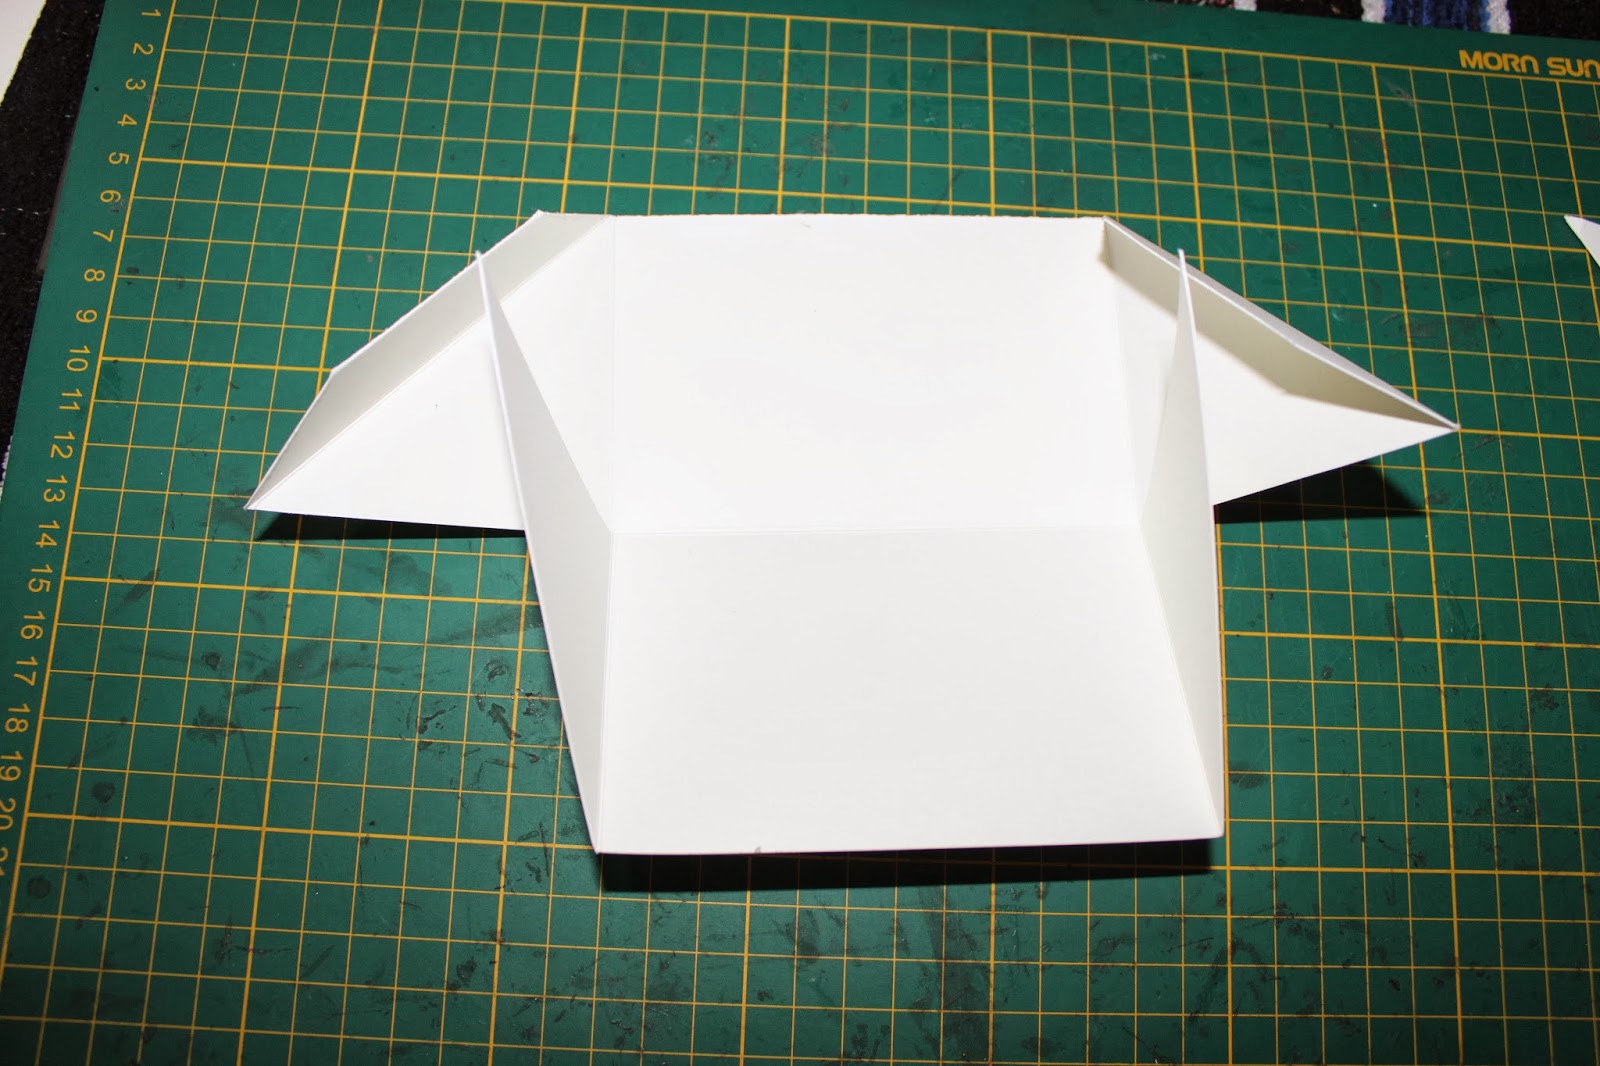
Step 6 - Cut along the horizontal scoreline up-to the vertical scorelines at both sides. Refer the Picture below. Your card stock should look like this.


Step 7 - Now fold along all the scorelines.


Step 8 - Apply glue all over the corner piece that has the flap as show below.


Step 9 - Stick the opposite triangles one on other to form a corner. And fold the flap inside.  


Now its turn for the other card stock which 
is 7" by 10 1/2 "

Step 10 - Place the 7" x 10 1/2" card stock on your scoreboard with the short side along the top and score at 3" and 6".  That extra 1" of paper is for the connecting flap.
Repeat all steps further up to step five. You get a similar shaped cardstock except that extra 1" flap which will be used as a connector..  


Step 11 - After doing the same procedure you get the second part of the box like shown in the picture below.


Step 12 - Now connect both the parts of the box by applying glue on the flap.


You get this...


Now its turn for the trays..

 Take your 5 5/8" x 5 5/8" card stock and score at 1 3/8 " at all the sides. 
And cut along one side score line at each corner.


Glue the flaps and form the tray container.. Make all three similarly.


Now stick all three trays inside the box by applying the glue at two sides of the tray.for the bottom most tray you can apply glue at the base of the box.


And .. Taddaaaa... Your Secret Box is ready ...  Decorate it to your accordance..


I had decorated mine ... And here's the finished look...  :)
Tilda is colored using Tim Holtz distress markers and those lovely flowers
 are hand made by me... :)


All the material variety used to make this Secret Box is available at 
Hope this tutorial is of some use to you.. Njoiii Crafting !!!

Please do not forget to participate in this month's challenge
 3 - Bs, Bag Box 'n Basket.
Thank you !!


Copyright © 2015 The Craft Shop
| Distributed By Gooyaabi Templates