Featured
Showing posts with label Shilpa Nagaonkar. Show all posts

Sunday, 20 September 2015

How to use EzMount for Rubber Stamps

Hello Everyone,
Shilpa here,

Today I would like to share with you my experience with Ez mounted Rubber stamps. Many of you know I love my stamps and specially rubber stamps with artsy designs. Priya's shop The Craft Shop has got fabulous collection of stamps, you can check them all here. 

Have you noticed some of the rubber stamps are 'unmounted' ..what does that mean.. they are not mounted on cling foam.
Crafty Individuals, Designs by Ryn...these stamps are under this category.
Either you can use them sticking on acrylic block with adhesive or you can use EZ Mount


EZ Mount comes in 8.5*11" sheet
I recently bought this and I am loving it!! 

here is small tutorial how to mount your rubber stamps on cling EZMount foam.

First Without mounting them, I stamped my butterflies using Jet black Archival Ink(for our future reference) .


Cut all the designs as closely as possible.


There are two sticky sides to EZ Mount foam. Use the one with instructions written on it.


Cut the foam according to the size of stamps.


Peel off the white text paper and stick stamp on it.


Cutout the side foam close to rubber stamp as much you can. Tim holtz Non-stick scissor works best for this.

I stamped butterfly images after adhering EZ Mount foam
here you will find clear difference.


Yes, with EZMount Cling foam stamp gives crisp image.

I feel this is very good investment for Stampers.
Do try it...you can buy them here.

Thanks so much for stopping by.


Wednesday, 16 September 2015

Different Ways to use Jones Tones Ultra Puff Paints

Hello Everyone,
Shilpa here,


Have you checked Jones Tones Puff and Glossy 3D paints at Priya's The Craft Shop yet!

And Good news is- they are in 25% off
check them here

Let's know more about them!
  • there are 2 types of 3D paints available- Puff and Glossy
  • they come in very ergonomic designed tube with super fine tip.
  • Can be used on Paper, Wood, Glass, Ceramics and Pottery.
  • Can be cleaned with water when it is wet.
  • Permanent colors
  • Soft and stretchable 

Here are few uses:

Decorate Frames

 (Source- Pinterest)


Alter Bottles or Mason Jars 

(Source- Pinterest)


Decorate Candle (you can use Jone Tones 3D Glossy for this)

(Source - Pinterest)

Decorate Tshirts

(Source - Alisa Burke blog )


Use on your cards

(Source- Pinterest)

Decorate your handmade flowers
(source- Pinterest )

    Make pearl swirls

    Easy Embellishments

    You will find here- Puff paints puff after heating with heat tool, creates wonderful texture.
    Sprinkle glitter on it when it is wet, creates beautiful embellishments 

      here is easy Mixed media background technique Tutorial with Jones Tones 3D paint...


      Stamp with background text stamp (here I've used Heidi Swapp) with Jet black Archival ink.
      Draw desired shape with Jones Tones puff paint. Let it dry. (takes 2-3 hours)


      Give the whole surface a coat of white gesso.


      Fill in water colours.


      Apply distress ink through stencil.


      Add some splashes of paints, circles of colors.....just for interest. 
      Highlight raised area with Viva Decor Ink gold
      and our background is ready


      Cut this according to your project need, you can make card, tag or small canvas with this...just need to add flowers and embellishments!

      Do try Jones Tones Puff Paints!!
      Grab it till they are in 25 % off Sale

      For more mixed media projects visit my blog - Neon diary

      Thanks so much for stopping by.


      Sunday, 30 August 2015

      Abstract Art with Tyvek

      Hello Everyone,
       Shilpa here, 
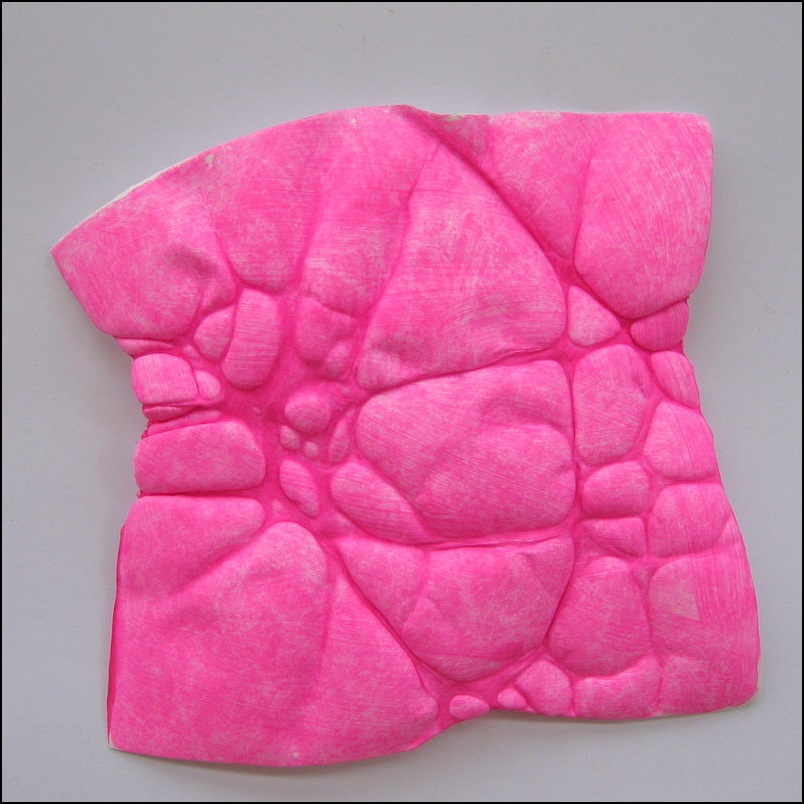
      I would like to share with you today, how we can create texture with Tyvek for mixed media abstract art work.
      here comes my first piece with Tyvek...


      Tyvek is a synthetic material consisting of Spun bound Olefin fiber. This material is very lightweight, strong, difficult to tear, but can be cut with Scissors/cutters. It is waterproof. 
      It is mainly used for as Housewrap while construction, for making envelopes.
      Priya has a stock of Tyvek in 12*12" size in her shop The Craft Shop


      But we crafters have different use- 
      As it is strong and durable - Used for Scrapbook binding.

      and recently I found out its use in mixed media work...!


            so let's see how I created the texture on tyvek

          cut to a size that suits, Paint the Tyvek.

      I've used different paints to try how it turns out.

      We have to provide heat to this it can be done with Iron or Heat Tool. both gives almost same results.

      Keep painted side down. Lay a sheet of baking paper/parchment paper/ protecting sheet over it and gently iron on high temp., actually you will have to hover the iron, and watch as the tyvek shrinks and shrivels and stop when your happy with the result. 

      the above sheet turned out something like this which I painted with regular acrylic color.

       I've also experimented with other kinds of colors


      Colour Arte Silks Acrylic glaze painted paper, turned out to be


       Alcohol ink splattered Tyvek, after heating turned out ...


      Distress Stain- Fossilized Amber 


      Color Arte Silk acrylic glaze - Honey Amber and Plum blossom

      This had got lovely two tone effect.

      Fevicryl Pearl Blue

      I love this shiny piece with bubble texture.

      So how to use it:

      *These are fabulous backgrounds for cards.

      * Can be used as embellishments.

      * Great for any mixed media backgrounds.

      I'll be going to do further experiments with Tyvek, do you?

        Thanks so much for stopping by.


      Sunday, 14 June 2015

      Dream Canvas with Tutorial

      Hello Everyone,

      Shilpa here,

      Today I've mixed media canvas to share with you.


      And here is the process:


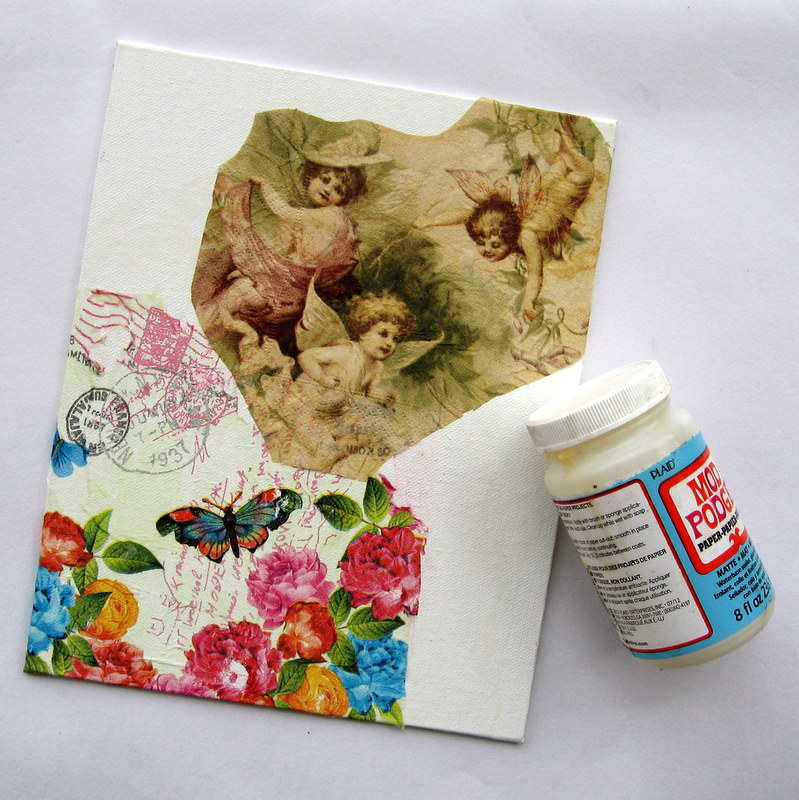
      I adhered 2 Decoupage napkins to canvas with Modge Podge Matt.


      Next applied Gesso for whole canvas and stenciled texture with Modelling paste.


      To color the canvas I used distress paints.


      When everything dried completely, I applied thin layer of Inka Gold- Old silver color for the raised areas and embellishments.


      When I arranged all embellishments my canvas was ready.

      Thanks so much for stopping by, for more mixed media inspiration visit my blog Neon diary


      Monday, 8 June 2015

      Easy Mixed Media Card with Fireworks sprays- Tutorial

      Hello Everyone,
      Shilpa here,

      As we have seen Imagine Crafts Fireworks sprays are so versatile, why don't we make a card with that..
      And today I've come up with easy mixed media card,
      yes I've step by step tutorial as well...


      I love burst of colors!! 


      I've used Prima Epiphany paper. I started with just spraying  different colors on surface.
      I heat set them in between all layers with Ranger Heat tool.


      Next I used Prima Finnabair stamp and Staz On Midi - Ganache for random stamping.


      For texture, I used stencil and texture paste...


      On another white card stock, I stamped butterfly with staz On midi and colored them with Bahama blue Fireworks spray....aren't those butterflies gorgeous!


      I fussy cut butterflies and adhered on card. I also added half pearls for more interest.


      Sentiment - Love is a die cut colored with fireworks ink.


      It was easy and fun card to make... I finished it in half an hour!
      Hope you are inspired ....would love to try it with Imagine Crafts Fireworks sprays


      Thanks so much for stopping by.


      Products used from The Craft Shop


      Copyright © 2015 The Craft Shop
      | Distributed By Gooyaabi Templates