featured

Friday, 31 January 2014

Challenge #8 - Trendy Chevrons/Triangles

Hi Everyone!

I am hoping that you all had a blast with the last challenge and we as DT's have been helpful in some way or the other to learn something new while we ourselves explore the new dynamics of crafting.

Challenge #7- Photo Inspiration

Today we have a new challenge, a photo inspiration challenge....first have a look at the photo that we have picked up and then I shall share the DT inspirations.

1420163_10151988564625660_345407807_n

Have a good look at the photo and get inspired with either its design or colour or anything else that you can pick up.....do mention in the entry what inspired you !!!!


Now for the DT Inspirations.....

Here is a series of beautiful CAS Cards made by Tanvi Shah....she got inspired by the colours!!!

Cas1

Cas2

Cas3


Charu is also inspired by colours but has added a few traingular pockets as tag holders...

Exbox+copy

Nupur again is inspired by colors and created this card with Distress inks,Spellbinders Floral Flourishes

DSC00905


Here is Pratiksha's inspiration with lovely splashes of colour....she has used ..Utee,Modelling paste,Harlequin stencil,Just rite labels 4 ,Versa mark,Gold embossing powder

photo+1

photo+2

photo+3


Rajni has made a sweet CAS card with the use of ... Aged Mohaghony and Black Soot Distress Inks,Versamark ink,Black Embossing Powder, Heat tool and  So Sweet Penny Black Stamp Set.


2

Priya has got inspired by the design and come up with an elegant card...using Best of Pebbles paper pad


Best+of+Pebbles+card-1


Finally, its time for my inspiration and like Priya I too was inspired by the chevrons/triangles....so here goes my projects

IMG_5670

IMG_5672

IMG_5673


To Participate, please follow these simple rules:

Follow our challenge blog.
                    Link only fresh entries. 
No back dated entries are eligible.
Link your blog post to our challenge post.
You can participate in a maximum of 5 challenges including ours.
Maximum three entries per person, please add 2 or 3 to your second & third entries.
Remove word verification to help our DTs leave a comment easily.


cert

The TOP 3 will receive a Winners Badge & one random winner will receive a GIFT VOUCHER worth Rs.500 from THE CRAFT SHOP - has a complete range of all your craft supplies. 

For any query regardsing any craft supply you can contact Priya Sivaraj at 

priyacrafty@gmail.com.

Tutorial - Gift box punch board

Hey everyone!

Pratiksha here today with my first post for the CCC blog :)

Im sure we're all drooling over the new punch boards from We r memory keepers! There are 5 designs in all - envelope, gift box, gift bag, pillow box and candy box!! You can get them all at our craftshop! Check them out if you haven't already.. :)

So i will share with you a super simple tutorial on using one of these boards. They all come with their own instruction manuals and a matching scoring tool as well. They're all very very simple to use.
I love the fact that each of them have their own specific colours that defines them :)

blogger-image--1679667325


Here is the tutorial on the gift box board :

Step 1
Choose your box size from the chart printed on the board itself - S, M, L or XL.
At this point be careful while picking the size as a small box can be square or rectangle as well. Based on this the chart will have the paper size required. Trim your paper to this size.

I choose a small box made with 6x6 paper resulting in a 2x2x2 finished box :)

blogger-image-2069710568


Step 2
Place the paper at the 'S' marking. Make all three scores - vertical, horizontal and diagonal.

Punch the paper.

Step 3
Rotate the paper by 90 degrees and repeat step 2 for all 4 sides

Step 4
Now flip the paper over and starting at the 'S' marking punch the paper as shown in the pic -

blogger-image-1387527717


Step 5
Use the other side of the punch and make the slit punch that will hold the box together.

blogger-image--1977986727


Step 6
Using the bone folder fold and crease all the scored lines. This will help in putting the box together.

blogger-image--1802341774

Step 7
Now fold the four corners inwards and then using the punched slits you can close the box. Voila'!!

blogger-image-187124478


You have your box in a matter of minutes. Embellish it as you please!

blogger-image--1576368159


Here are my boxes that i made with this board!

Thursday, 23 January 2014

Secret / Magic Box Tutorial


Hello everyone!!!

This is Charu from Crafted Creations . Hope everyone's at their highest crafting spirits in this first month of the new year.
Today I am going to share a picture tutorial on
How to make a Secret Box / Magical Box
Remember this one, I made as inspiration for you all for our this month's challenge 3-Bs..

So lets start...

You will need five pieces of card stock, one- 6" by 10 1/2 ",
one 7" by 10 1/2 ", three pieces 5 5/8" by 5 5/8 "

IMG_4810

Step 1 - Place the 6" x 10 1/2" card stock on your scoreboard with the short side along the top and score at 3". and then  Rotate the card stock so the long side is along the top and score at 3" and 7 1/2".

IMG_4815IMG_4831

Step 2 - At one corner of the card stock, score diagonally by lining up the corners along one of the inch grid line on your scoreboard.


IMG_4825


 Step 3 -   Score also at 1" away from the first scoreline.   Do same scoring at the 
other corner also (same side of the card stock )..
IMG_4826


Step 4 - Trim off the small corner triangle. Both corners as you can see in below picture. 

IMG_4834

Step 5 - Cut the triangles at the other side also.   


IMG_4837

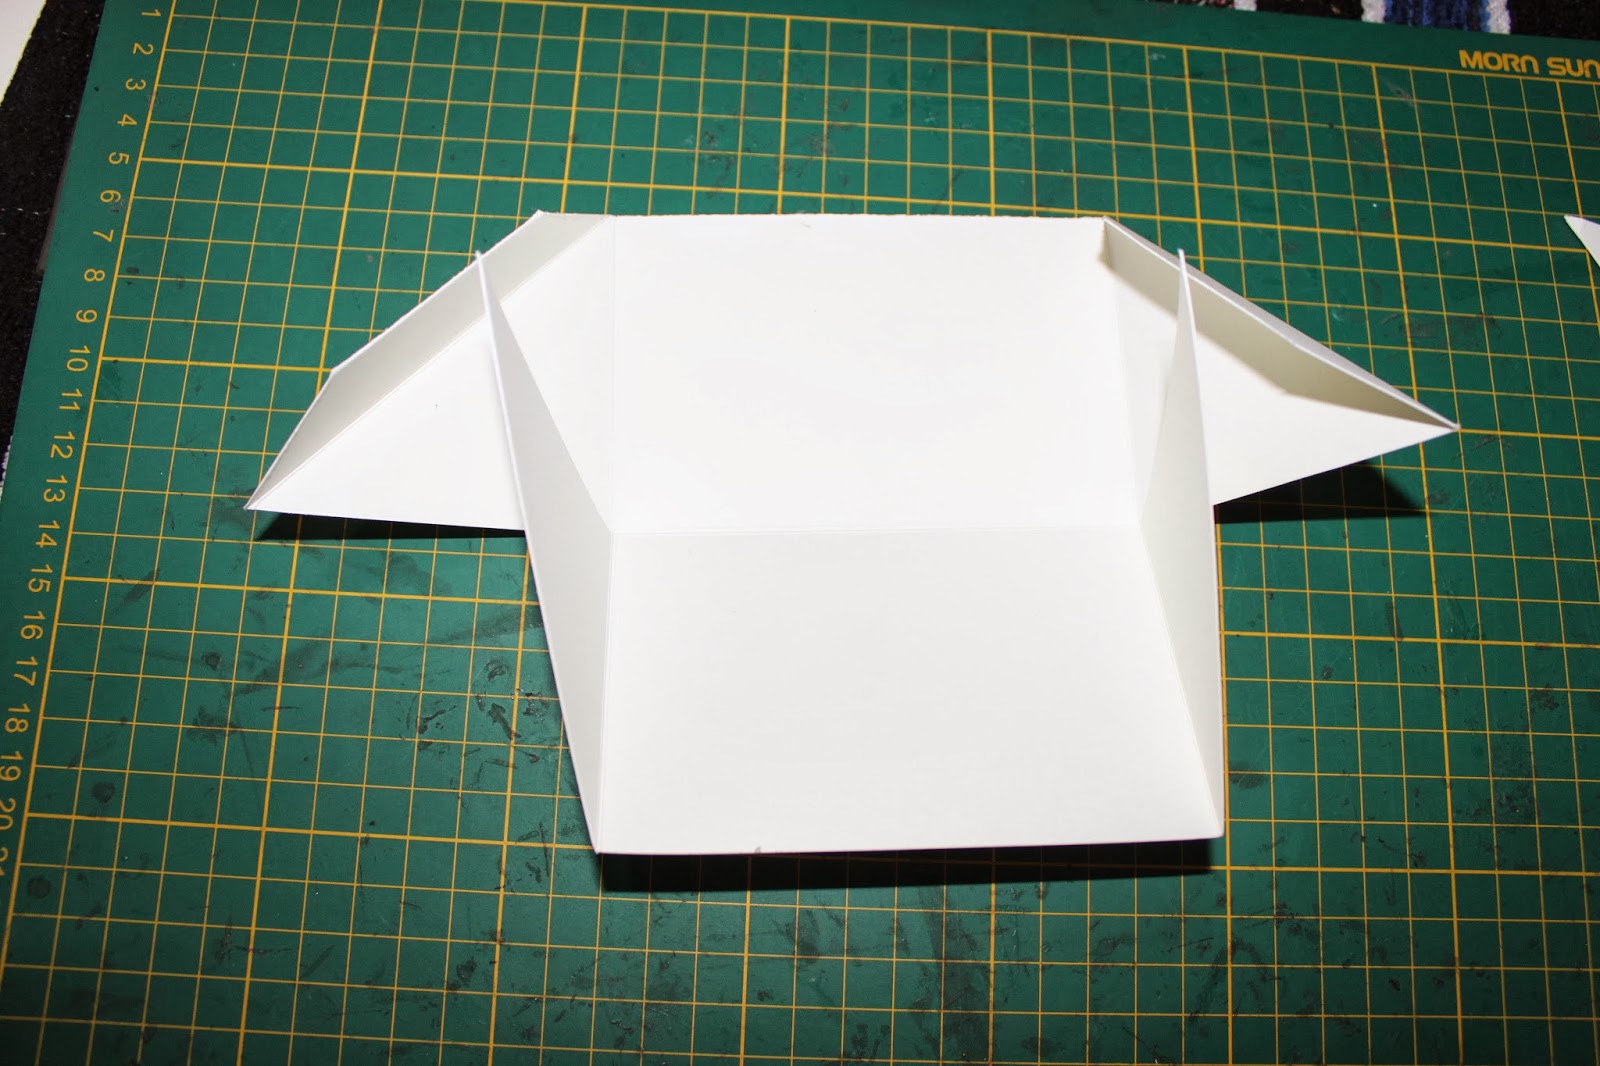
Step 6 - Cut along the horizontal scoreline up-to the vertical scorelines at both sides. Refer the Picture below. Your card stock should look like this.

IMG_4838

Step 7 - Now fold along all the scorelines.

IMG_4839


Step 8 - Apply glue all over the corner piece that has the flap as show below.


IMG_4840

Step 9 - Stick the opposite triangles one on other to form a corner. And fold the flap inside.  


IMG_4843


Now its turn for the other card stock which 
is 7" by 10 1/2 "

Step 10 - Place the 7" x 10 1/2" card stock on your scoreboard with the short side along the top and score at 3" and 6".  That extra 1" of paper is for the connecting flap.
Repeat all steps further up to step five. You get a similar shaped cardstock except that extra 1" flap which will be used as a connector..  

IMG_4845

Step 11 - After doing the same procedure you get the second part of the box like shown in the picture below.

IMG_4847

Step 12 - Now connect both the parts of the box by applying glue on the flap.

IMG_4854

You get this...

IMG_4856

Now its turn for the trays..

 Take your 5 5/8" x 5 5/8" card stock and score at 1 3/8 " at all the sides. 
And cut along one side score line at each corner.

IMG_4857

Glue the flaps and form the tray container.. Make all three similarly.

IMG_4860

Now stick all three trays inside the box by applying the glue at two sides of the tray.for the bottom most tray you can apply glue at the base of the box.


IMG_4862

And .. Taddaaaa... Your Secret Box is ready ...  Decorate it to your accordance..

IMG_4867


I had decorated mine ... And here's the finished look...  :)
Tilda is colored using Tim Holtz distress markers and those lovely flowers
 are hand made by me... :)

IMG_4868

IMG_4873

Secret+box+col

All the material variety used to make this Secret Box is available at 
Hope this tutorial is of some use to you.. Njoiii Crafting !!!

Please do not forget to participate in this month's challenge
 3 - Bs, Bag Box 'n Basket.
Thank you !!


Monday, 20 January 2014

Box Tutorial with a Single Sheet

Hello Friends...

This is Nupur here & today I am going to share a small & simple video tutorial with you all...

This tutorial will show you how you can make a 3"x3" box with a single sheet of cardstock, some scored lines & little cutting.

I have decorated the box with Love &  Valentines day theme...

DSC00840

DSC00843

The box is opened by untying the ribbon...

DSC00848

DSC00847

There are 2 small pockets inside each of the lid flaps...

DSC00844

I have added few cute little love theme tickets inside the pockets..

DSC00846

Here is the video tutorial to make this fast & easy box..


P.S. : This is my first attempt at video tutorial & I have made some mistakes.. I don't know how some parts of the video went out of focus & got blurred during the shooting of this video.. Sorry for that... please bear with me... 


cutting+&+scoring+guide+for+box+tutorial


Products used:

Worn Lipstick Distress Ink
Black Memento Dew Drop
MS Doily Punch
Just Rite Clear Stamps
MS Score Board
Cutting Mat
Blending Foam
Acrylic Block

P.S. : Have you participated in our ongoing challenge 3B's : Boxes, Bags, Baskets ???


Thank you for visiting...
Copyright © 2015 The Craft Shop | Distributed By Gooyaabi Templates