Creating Backgrounds with Stencils
Hello everyone,
I hope all of you are enjoying the first challenge and of course at the same time learning a lot with the things the DT team is sharing about different products and different techniques...
Today am here with a few techniques to create backgrounds with Stencils for your cards, scrapbooks or this could help you with your mixed media projects too!
There was a time when the only thing I knew for making a card or scrapbooking base was a piece of Cardstock on which a Pattern Paper was stuck and then you embellish it. Slowly I was introduced to the wonders of stamping and then mists and sprays came into existence and slowly and steadily many new products have been introduced in the time which give us a lot more options now to create our own background as per our style and theme of the project. Innovation with these products depends on how much you like to experiment...however am going to show you and talk to you about a few techniques with Stencils like The Crafters Workshop, Prima or any local brand too!
The traditional way of using a stencil would be to trace the outline and then color the insides or paint the insides directly with the help of a dauber or brush but with the introduction of inks and mists we have learnt many more styles...
A few things that I love using while working with Stencils...

Lets get a closer look at the items....

1. Stencils and Paint Brushes

2. Dylusions or any other mists and Texture White or Modelling Paste
 3. Memento Fireworks is another mist one can use

4. My favourite Studio Multi Medium Gloss

5. A few background stamps to give layers

6. Palette or Spatula
Now with the ingredients in place lets see what all can one do with stencils....
One can go with the simple process of using stencils and distress inks or misting ....


This process can be done with any ink or chalks too...
A simple blunder of mine from which you can learn is ...never use a textured Cardstock as the distressing and blending appears in patches.
The next one is with misting..


I wanted a slight shimmer so I used the Memento Fireworks Spray ...one can use dylusions or any other mists in the above process.
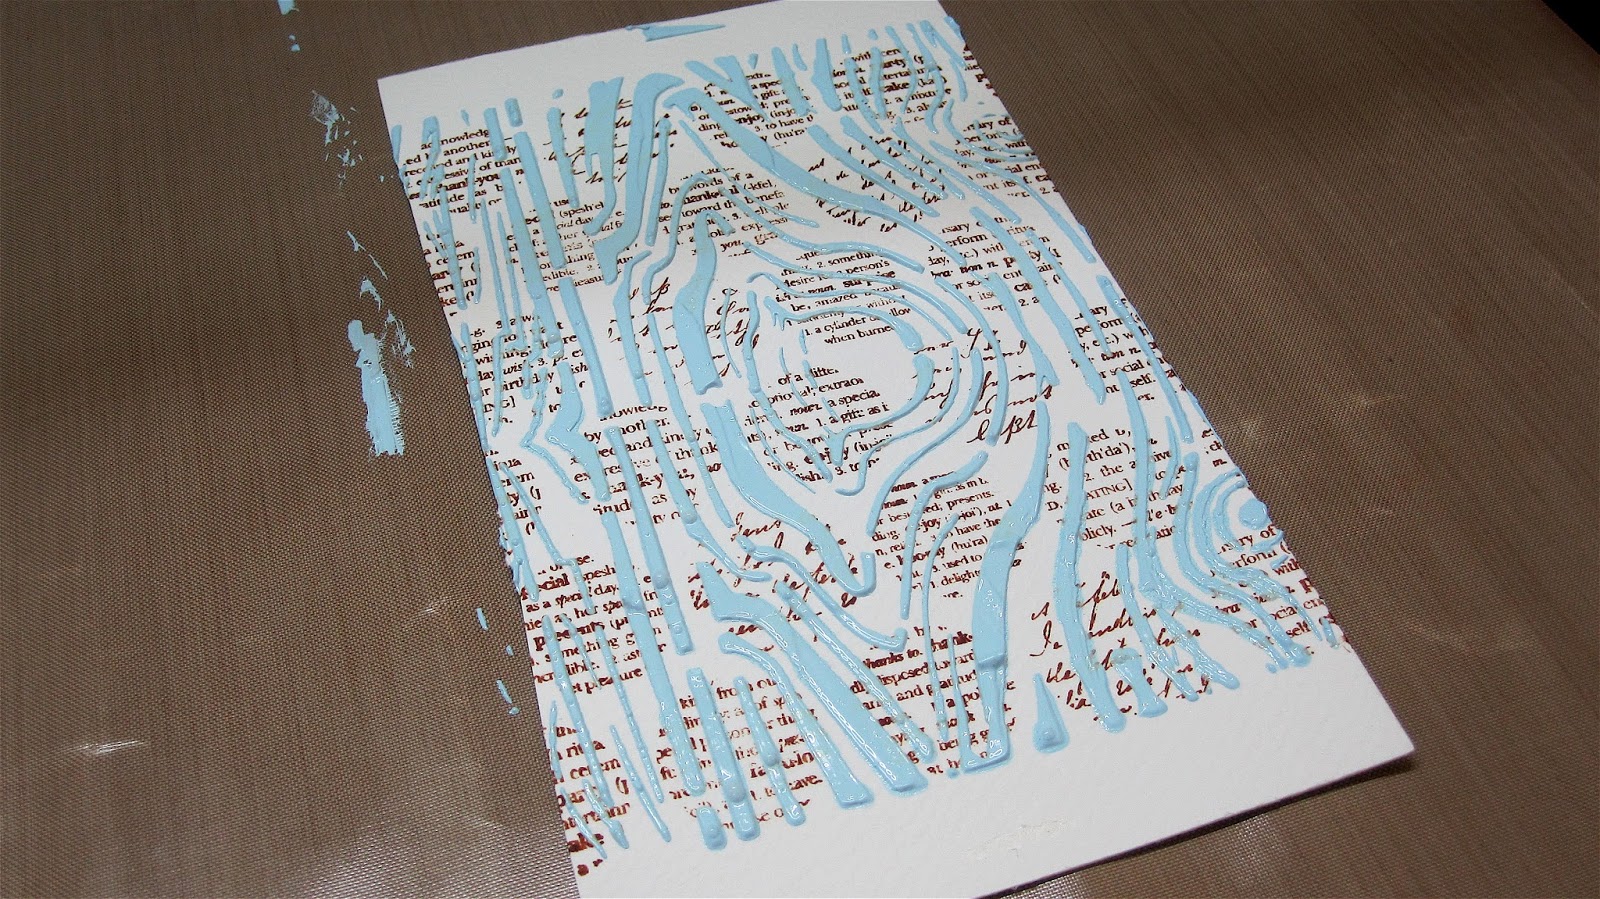
The third process involves Texture White or one can use Modelling paste...both differ in their consistency....and depending on the end effect one wants one can select which one of the paste to go ahead with. I have used Texture White.

Stamp a background to give a layered look

Place the stencil above as you want

Take out a little texture white on a plate and mix it with acrylic paints...you could apply the texture white without the color also and paint over it after it dries once the stencil is removed...


Evenly spread the mix with a spatula


After you feel you have covered the area entirely to get the desired effect....stop and with a careful and light hand remove the stencil...

Here is what you will get...and you are ready to add this piece in your card...or do the same process directly on your scrapbook or mixed media projects...

A closer look
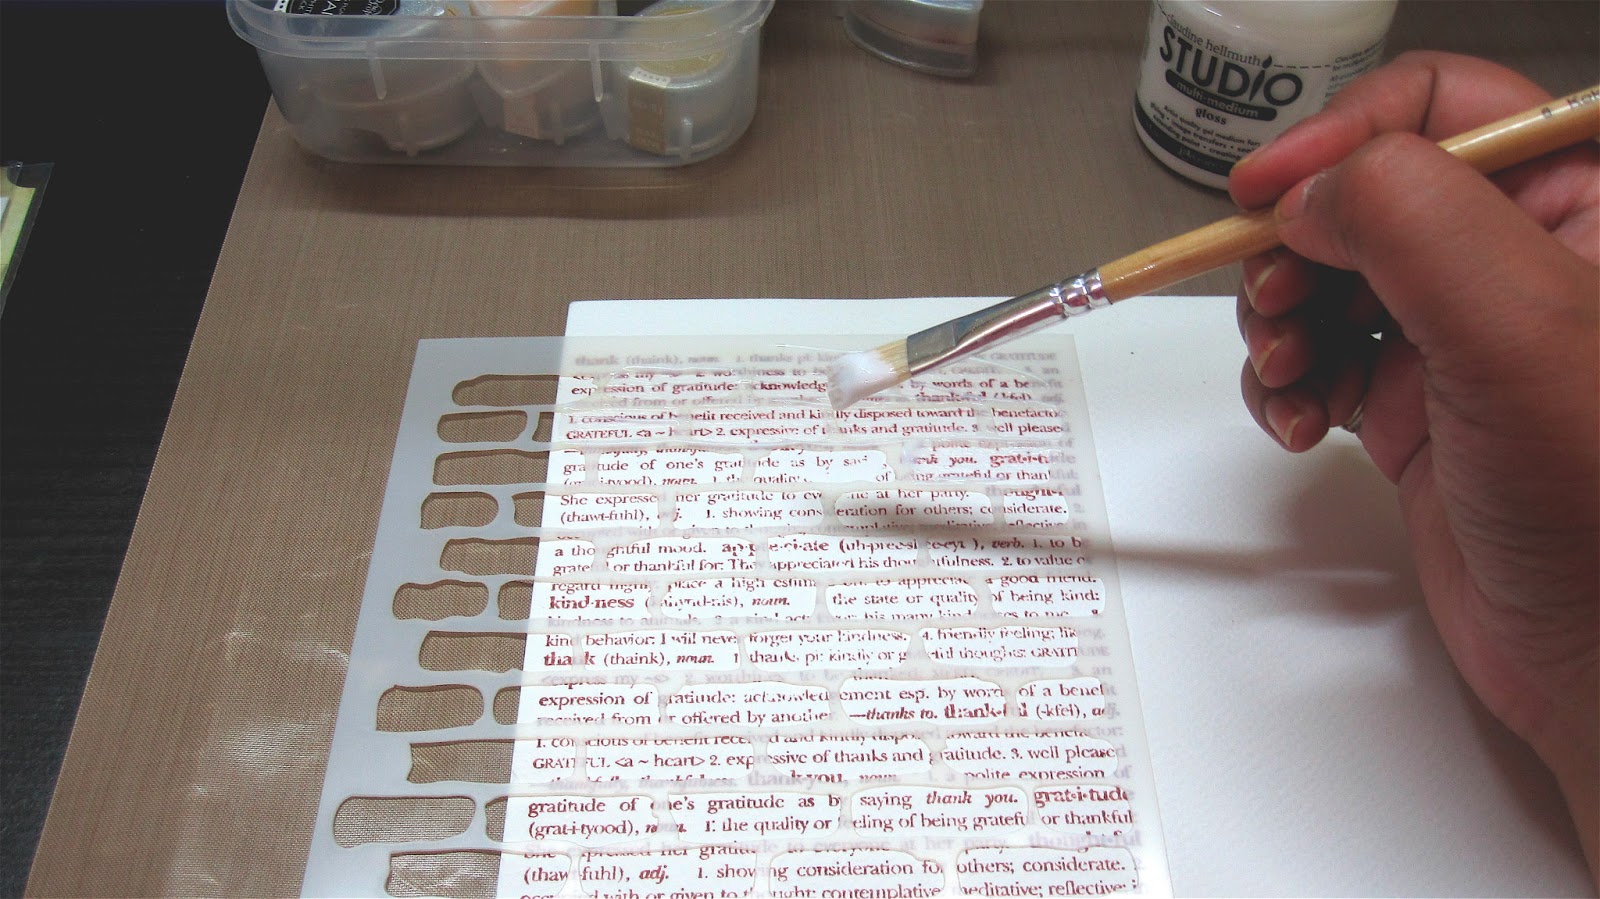
Now am showing you my favourite technique of stencil use...

Stamp a background stamp on a cardstock

Place the desired stencil over it as per your requirement

Take a paint brush and pick a little of the Studio Multi Medium Gloss and start put applying it through the stencils on the stamped background

Apply it in one stroke in one direction

I like leaving a few places blank ....as in I did not apply the Gloss on a few bricks here and there...and then leave it to dry or you can blow dry it with the help of your heat gun or hair dryer

Take the ink color you want on an applicator and start coloring over it in circles....

Do you see that the gloss actual resists the color and pushes it only to the edges ...the gloss does pick up a slight color but its very negligent

Once you are satisfied with the coloring remove the stencil

This is what you will get as the end result....the places where you see the dark brown colored bricks are the areas that didnt have the Studio Gloss Medium applied on it...

All four together....
I personally love the last two techniques and use them the most in my projects ...however there are two other simpler methods too...
1. Place your stencil on the desired Cardstock and apply Versa mark over it or embossing ink over it....remove the stencil and sprinkle embossing powder or flocking powder as per your wish and heat set it to get a beautiful effect...
2. Place your stencil on the desired Cardstock and apply perfect pearls over it....try it with a mix of two to three colors and remove the stencil ...You will love what you see !
Well these are a few ways to play around with your stencil to create backgrounds but experimenting with products teaches us new ways that we discover on our own...so do not stop the process of experimenting and while you do that I shall take your leave only to be back with some more backgrounds techniques in my next post.....till then HAPPY CRAFTING!!
I hope all of you are enjoying the first challenge and of course at the same time learning a lot with the things the DT team is sharing about different products and different techniques...
Today am here with a few techniques to create backgrounds with Stencils for your cards, scrapbooks or this could help you with your mixed media projects too!
There was a time when the only thing I knew for making a card or scrapbooking base was a piece of Cardstock on which a Pattern Paper was stuck and then you embellish it. Slowly I was introduced to the wonders of stamping and then mists and sprays came into existence and slowly and steadily many new products have been introduced in the time which give us a lot more options now to create our own background as per our style and theme of the project. Innovation with these products depends on how much you like to experiment...however am going to show you and talk to you about a few techniques with Stencils like The Crafters Workshop, Prima or any local brand too!
The traditional way of using a stencil would be to trace the outline and then color the insides or paint the insides directly with the help of a dauber or brush but with the introduction of inks and mists we have learnt many more styles...
A few things that I love using while working with Stencils...

Lets get a closer look at the items....

1. Stencils and Paint Brushes

2. Dylusions or any other mists and Texture White or Modelling Paste


4. My favourite Studio Multi Medium Gloss

5. A few background stamps to give layers

6. Palette or Spatula
Now with the ingredients in place lets see what all can one do with stencils....
One can go with the simple process of using stencils and distress inks or misting ....


This process can be done with any ink or chalks too...
A simple blunder of mine from which you can learn is ...never use a textured Cardstock as the distressing and blending appears in patches.
The next one is with misting..


I wanted a slight shimmer so I used the Memento Fireworks Spray ...one can use dylusions or any other mists in the above process.
The third process involves Texture White or one can use Modelling paste...both differ in their consistency....and depending on the end effect one wants one can select which one of the paste to go ahead with. I have used Texture White.

Stamp a background to give a layered look

Place the stencil above as you want

Take out a little texture white on a plate and mix it with acrylic paints...you could apply the texture white without the color also and paint over it after it dries once the stencil is removed...


Evenly spread the mix with a spatula


After you feel you have covered the area entirely to get the desired effect....stop and with a careful and light hand remove the stencil...
Here is what you will get...and you are ready to add this piece in your card...or do the same process directly on your scrapbook or mixed media projects...

A closer look
Now am showing you my favourite technique of stencil use...

Stamp a background stamp on a cardstock

Place the desired stencil over it as per your requirement

Take a paint brush and pick a little of the Studio Multi Medium Gloss and start put applying it through the stencils on the stamped background

Apply it in one stroke in one direction
I like leaving a few places blank ....as in I did not apply the Gloss on a few bricks here and there...and then leave it to dry or you can blow dry it with the help of your heat gun or hair dryer

Take the ink color you want on an applicator and start coloring over it in circles....

Do you see that the gloss actual resists the color and pushes it only to the edges ...the gloss does pick up a slight color but its very negligent

Once you are satisfied with the coloring remove the stencil

This is what you will get as the end result....the places where you see the dark brown colored bricks are the areas that didnt have the Studio Gloss Medium applied on it...

All four together....
I personally love the last two techniques and use them the most in my projects ...however there are two other simpler methods too...
1. Place your stencil on the desired Cardstock and apply Versa mark over it or embossing ink over it....remove the stencil and sprinkle embossing powder or flocking powder as per your wish and heat set it to get a beautiful effect...
2. Place your stencil on the desired Cardstock and apply perfect pearls over it....try it with a mix of two to three colors and remove the stencil ...You will love what you see !
Well these are a few ways to play around with your stencil to create backgrounds but experimenting with products teaches us new ways that we discover on our own...so do not stop the process of experimenting and while you do that I shall take your leave only to be back with some more backgrounds techniques in my next post.....till then HAPPY CRAFTING!!


.jpg)


Thanks Saumya for sharing these wonderful BGs, loved the last technique.......will definitely try soon.
ReplyDeleteWonderful post Saumya..besides ur techniques i loved the way u gave a hundred dollar tip...experimenting with products teaches us new ways that we discover on our own...so do not stop the process of experimenting.
ReplyDeleteWow ! Great post saumya !! Priya ! Your blog is on the rolll !!!!! Keep it up gals !
ReplyDeletewow - well narrated and very easy to understand, thanks rajini mam
ReplyDeleteThis is amazing.. I am going to try all of this.. tada!!
ReplyDeletewow tons of techniques thanx for sharing.
ReplyDeletewhat a wonderful tute...thanks for sharing:)
ReplyDeleteWonderful ideas to use stencils in projects and with various mediums !Thanks a lot for sharing !
ReplyDeleteHey want to do these kind on wall can u plz suggest as what colour should i use and some tips.....thanx in advance
ReplyDeleteWow....beautiful post! loved the last one :)
ReplyDeleteLoved your post Saumya ..Thank you so much for sharing the tips regarding these template's ...As a newbie to them i really loved seeing the different things one can do with it ...All the BG you have created look awesome :)
ReplyDeleteawesome !
ReplyDeletewell explained