Coloring with Distress Inks
Hello Lovely Ladies,
This month we are focusing on the magical Tim Holtz’s Distress Inks. Yes I will call them magical inks. I got my first sets of these ink pads about two months back only and I am already loving them so so much. These inks can be used for stamping, embossing, coloring..etc. Our DT team will be revealing it’s techniques and uses throughout this month. If you missed our DT Rajni Chawla's superb post on distress inks, do checkout here.
I love to add images in my projects. And hence I color them. I really tried hard earlier to get the perfect results with watercolor pencils but was never satisfied with some areas like hairs, face, skin. Now I have started coloring my stamped images with distress inks and yes I got what I wanted - intense colors with very good blending and of course finished it in much lesser time. This is the image which I colored with distress inks. Check out my complete card here.
So today I will be sharing some tips and steps on how to use distress inks to color images. You should gather these basic materials -
- Distress inks - Colors of your choice
- Watercolor paper - Take a heavy weight watercolor paper for stamping to avoid tearing while working with water n inks.
- Waterproof ink - Use permanent archival ink to stamp your image. I have used ColorBox Archival ink. Ranger's Versafine or Stazon can also be used.
- Acrylic Block or Craft Sheet
- WaterBrush - I am using Sakura Koi Waterbrush
- Tissues
- Heat gun or Dryer (optional) - Can be used to dry the paper in between.
The portable Sakura Koi Waterbrush comes in two separate pieces that screw together. The barrel holds water and has a small cap. Don't throw it away !
How Koi Brush works?
When you squeeze the barrel, water enters the nylon bristles, thus eliminating the need for a separate water container. It also makes cleaning the brush between colors a breeze.
Best thing about waterbrushes is that the constant water supply will allow you to go from dark to light in a natural unbroken graduation.You can start your stroke where you want the color to be the darkest and most saturated, and work your way to the lighter, less saturated areas.If you stay with the stroke long enough, it will go all the way to pure water. You can utilize this unique feature to get some great effects.
Ok enough talk about the brush, lets begin coloring
Rules which I always follow while coloring, which may vary from person to person
(i) Choose at least one light and a dark shade of a color to add depth
(ii) Go from light to dark shade and color from outside to inside of area you are coloring
(iii) Leave few areas for highlights.
(iv) Always apply a light coat of color first. You can make it darker later on but not vice versa.
Hairs
Step 1 : Stamp your favorite image using archival ink on watercolor paper. I am using cute and naughty "Odd Girl Stamp Artist Mae "available at The Craft Shop. Check the complete range here.
Step 2 : I always begin with hair coloring which according to me is the most difficult part. Choose the ink pads you like.I am doing brown hairs so I chose - Vintage Photo and Walnut Stain. Tap a small amount vintage photo directly on acrylic block and dilute it. A very small is sufficient
.
Take your waterbrush and ink it up and apply strokes on image leaving areas for highlights
Apply second coat of vintage photo but this time shorten the length of the strokes
Now take walnut stain.Use tissue to clean brush and acrylic block before taking next color. For darker shades I prefer to pick color directly from the ink pad. Apply shorter strokes.
Face
Step 3 : Next color the face. Again take diluted vintage photo and apply on the outer edge
Dilute it more and apply on rest of the facial area leaving a small portion for highlighting. .Make sure to blend it well with the outline.Here you will know how important it is to use a waterbrush. You can also use other colors like tattered rose, worn lipstick, antique linen or their combinations.
Color rest of the skin in the same manner
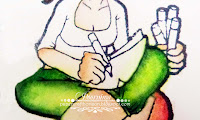
Sharing pics of rest of the parts. I think they are self explanatory
Finished Artist Mae
One more
Hairs - vintage photo
Skin - worn lipstick and vintage photo
I have also colored other stamped image using Distress Inks. Take a look
 |
| Mustard Seed, Spiced Marmalade, Vintage Photo |
 |
| Picked Raspberry, Fired Brick, Worn Lipstick One stamp in four different ways |
 |
| Mowed Lawn, Shabby Shutters, Mustard Seed, Vintage Photo |
 | |
|
 |
| Fired Brick, Picked Raspberry, Vintage Photo, Worn Lipstick |
Try coloring diecuts specially intricate diecuts. I have ruined few of my diecuts with blender tool. Waterbrush is the safest tool to do so.
 |
| IO Love Birds Die |
Ending my lengthy post here. Hope I have inspired you a bit. Do drop a comment. We would love to hear from you and will be back with more doses of ideas on distress inks. N don't forgot to participate in our current challenge "Spread Your Wings with Distress Inks". Till then
Have Fun Crafting
Poornima


.jpg)


Coloring images is not my cup of tea........but after your step wise guide I sure am going to try!!! Your coloring is picture perfect, especially the flowers!
ReplyDeleteThank you so so much for this wonderful tutorial and Techniques Poornima ..Like Tanvi I too am not very comfortable with coloring images especially when it comes to hair and body part's but after seeing your so well explained tutorial I am definitely going to give it a try ..Your stamped and colored flowers and leaves are so gorgeous I hope i can do my coloring half as well as you :)
ReplyDeletePoornima this is a gem of a post..I dont enjoy coloring and so have stayed away from stamping but you are tempting me!!
ReplyDeleteSuch a lovely tutorial Poornima !! I loved your coloring !
ReplyDeleteI loooove the flowers you have coloured! Amazing results..i too love colouring with distress inks...they really are fun and time saving. Thanks for the tutorial...
ReplyDeletePoornima!! This is an exhaustive post on coloring with distress inks!! And oh I simply love the colored images!! Thanks a lot for sharing this info!!!very useful
ReplyDeleteHey thats a beautiful well explained tutorial poornima.. I've always been skeptical about coloring. But after seeing yhis post.. m soo tempted to try one.. thanks.. looking fwd to more inspiration from u guys.. !!
ReplyDeleteAbsolutley fabulous post!! I have to try this now!
ReplyDeleteThats an awesome tutorial, u really got the nitty gritties so well ... TFS
ReplyDeleteThanks for this. Nicely explained. Definitely helpful for the beginners like me.
ReplyDeleteWonderful post
ReplyDelete