Secret / Magic Box Tutorial
Hello everyone!!!
This is Charu from Crafted Creations . Hope everyone's at their highest crafting spirits in this first month of the new year.
Today I am going to share a picture tutorial on
How to make a Secret Box / Magical Box
Remember this one, I made as inspiration for you all for our this month's challenge 3-Bs..
So lets start...
You will need five pieces of card stock, one- 6" by 10 1/2 ",
one 7" by 10 1/2 ", three pieces 5 5/8" by 5 5/8 "

Step 1 - Place the 6" x 10 1/2" card stock on your scoreboard with the short side along the top and score at 3". and then Rotate the card stock so the long side is along the top and score at 3" and 7 1/2".


Step 2 - At one corner of the card stock, score diagonally by lining up the corners along one of the inch grid line on your scoreboard.

Step 3 - Score also at 1" away from the first scoreline. Do same scoring at the
other corner also (same side of the card stock )..

Step 4 - Trim off the small corner triangle. Both corners as you can see in below picture.

Step 5 - Cut the triangles at the other side also.

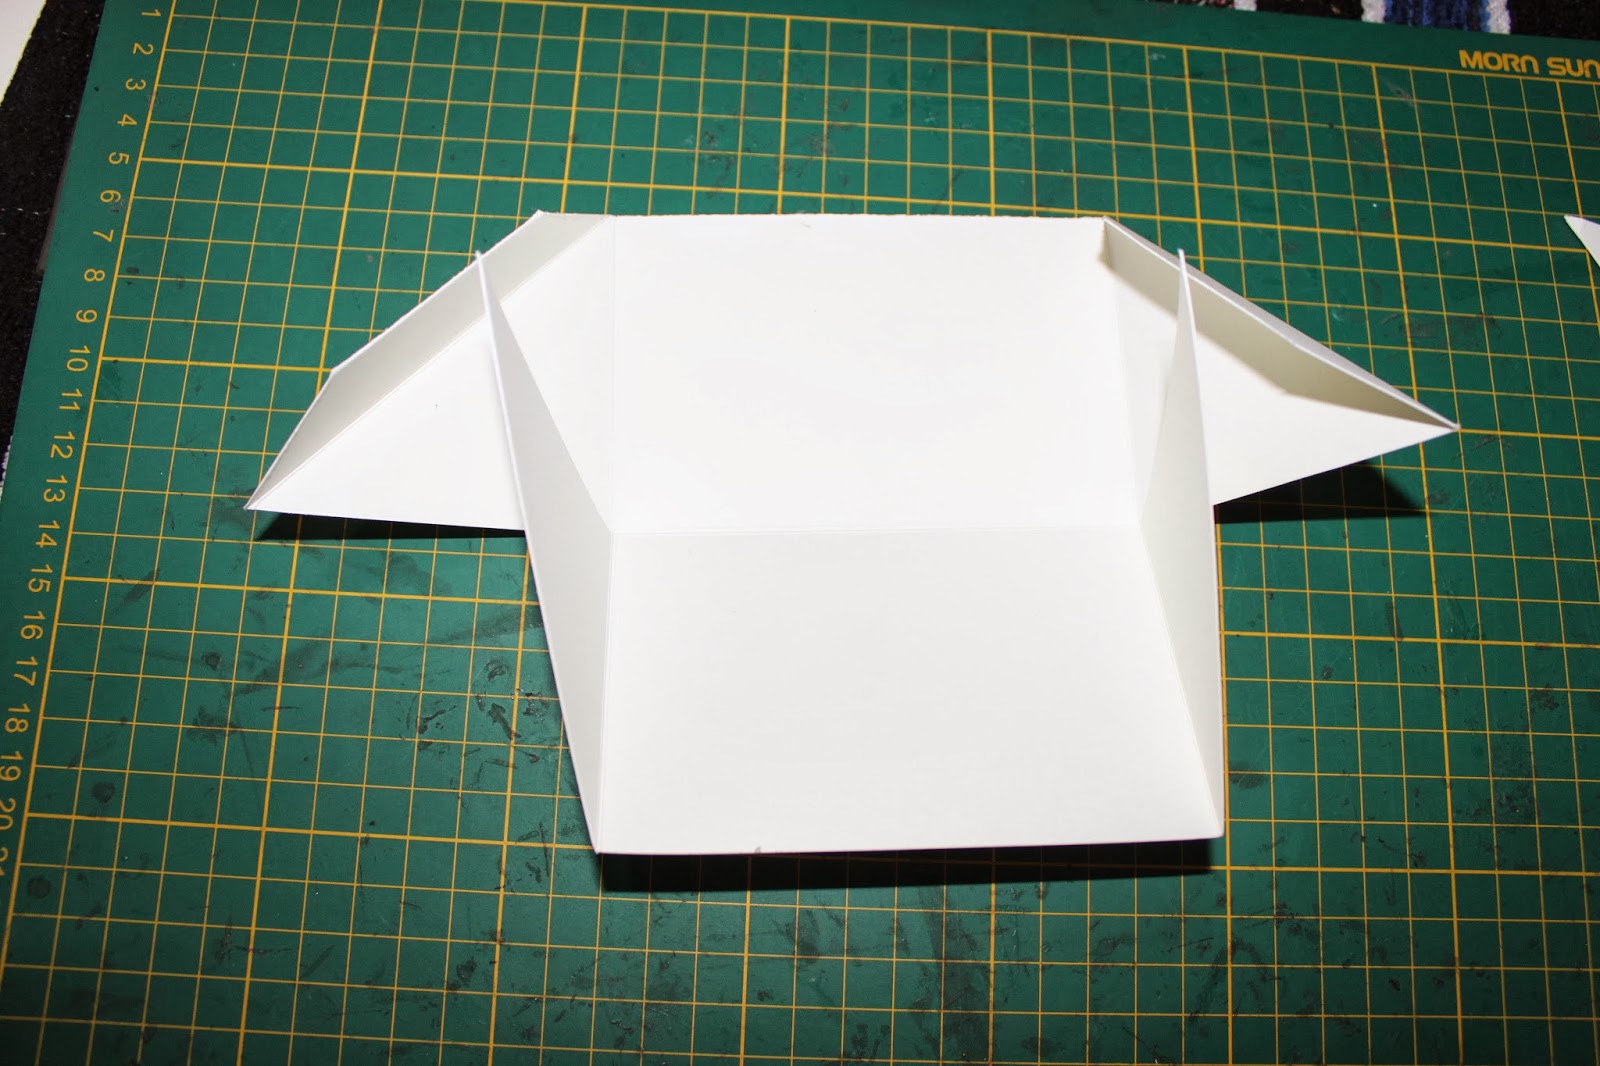
Step 6 - Cut along the horizontal scoreline up-to the vertical scorelines at both sides. Refer the Picture below. Your card stock should look like this.

Step 7 - Now fold along all the scorelines.
Step 8 - Apply glue all over the corner piece that has the flap as show below.

Step 9 - Stick the opposite triangles one on other to form a corner. And fold the flap inside.

Now its turn for the other card stock which
is 7" by 10 1/2 "
Step 10 - Place the 7" x 10 1/2" card stock on your scoreboard with the short side along the top and score at 3" and 6". That extra 1" of paper is for the connecting flap.
Repeat all steps further up to step five. You get a similar shaped cardstock except that extra 1" flap which will be used as a connector..

Step 11 - After doing the same procedure you get the second part of the box like shown in the picture below.

Step 12 - Now connect both the parts of the box by applying glue on the flap.

You get this...

Now its turn for the trays..
Take your 5 5/8" x 5 5/8" card stock and score at 1 3/8 " at all the sides.
And cut along one side score line at each corner.

Glue the flaps and form the tray container.. Make all three similarly.

Now stick all three trays inside the box by applying the glue at two sides of the tray.for the bottom most tray you can apply glue at the base of the box.

And .. Taddaaaa... Your Secret Box is ready ... Decorate it to your accordance..

I had decorated mine ... And here's the finished look... :)
Tilda is colored using Tim Holtz distress markers and those lovely flowers
are hand made by me... :)


All the material variety used to make this Secret Box is available at
Hope this tutorial is of some use to you.. Njoiii Crafting !!!
Please do not forget to participate in this month's challenge
3 - Bs, Bag Box 'n Basket.
Thank you !!


.jpg)


Super tutorial Charu
ReplyDeleteBeautiful box! Thats a well explained Tutorial Charu!! Thanks for sharing!
ReplyDeleteThank you Priya !! :) hugs !!!
DeleteThats a beautifully coloured tilda ,gorgeous box!
ReplyDeletehey can u also show a tutorial for these flowers u made... :) nice tutorial btw.. wel explained.. :)
ReplyDeleteSure !! will try to do that soon... Thank you !! :)
Deletevery descriptive tutorial charu...thanks and beautifully embellished box.
ReplyDeleteVery descriptive tutorial, Charu...thanks and beautifully embellished box.
ReplyDeleteTutorial is absolutely self explanatory...........thanks for sharing.
ReplyDeleteThank you dear !! :) with hugss !!
Deletethank u very much for the detailed tutorial
ReplyDeleteawesome :-)
ReplyDeleteAwesome :-)
ReplyDeleteHi Team,
ReplyDeleteThis is such an interesting tutorial! And more so - so nicely explained. I am sure going to try out this one. Lovely task of decorating the box too :)
Omg....its quite difficult to take a click at every small step and u did it so efficiently Charu...A very well explained!!
ReplyDeletei did it ......
ReplyDelete