Glam up some more with glitter!!
A super good morning to all you lovely ladies!
Hope you've been enjoying all the awesome posts by our fellow DT members. Each one has been made with a lot of hard work! :)
As for me, I've only been shopping and not crafting! Hehehe.. Who can blame me?! Check out the gorgeous products at thecraftshop and you'll be sailing alongside! ;p
This months challenge is all about glam with glitter and isn't it awesome that we now have our own brand of superfine glitter!! It comes in 15 awesome shades in little PET bottles that are easy to store and no question of spills! The little size is sooooo convenient as well :) I love it!

Im here today to showcase also our tacky/double-sided tape. It's very economical and has great sticking as well. Its permanent and the roll itself lasts really long!!
Here is a little tute on how to use the tacky tape for something besides the usual sticking :) (of course it has to include glitter!!!)
Materials needed -
Cardstock
Tacky tape
Super fine glitter
Scissors
Funnel tray
1. Place the tacky tape vertically and at equal distance. Remove the red lining and then sprinkle the glitter. Spread the glitter evenly and then shake off the excess. This is what you will get.


I tried the same method with several shapes


Im here today to showcase also our tacky/double-sided tape. It's very economical and has great sticking as well. Its permanent and the roll itself lasts really long!!
Here is a little tute on how to use the tacky tape for something besides the usual sticking :) (of course it has to include glitter!!!)
Materials needed -
Cardstock
Tacky tape
Super fine glitter
Scissors
Funnel tray
1. Place the tacky tape vertically and at equal distance. Remove the red lining and then sprinkle the glitter. Spread the glitter evenly and then shake off the excess. This is what you will get.
2. Repeat step one horizontally and you will get this grid pattern (I tried just the grid, but you can choose any pattern :)
3. Use another set of lines for a second glitter shade. You will get this -
4. Here is what i made with my glitter background!
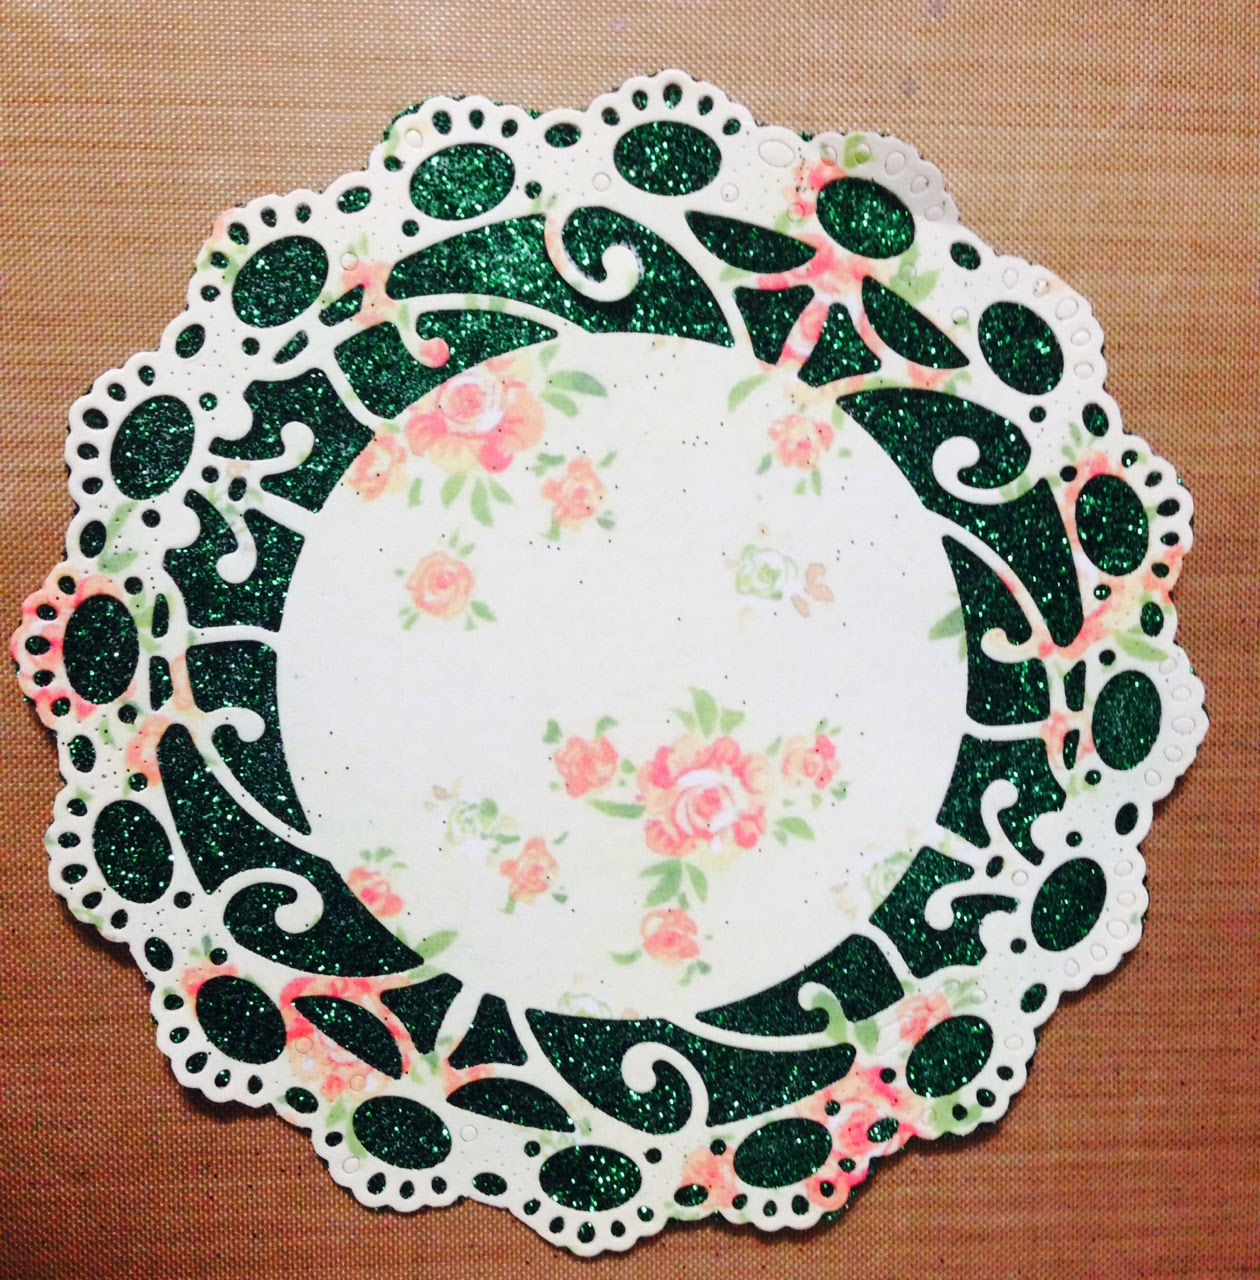
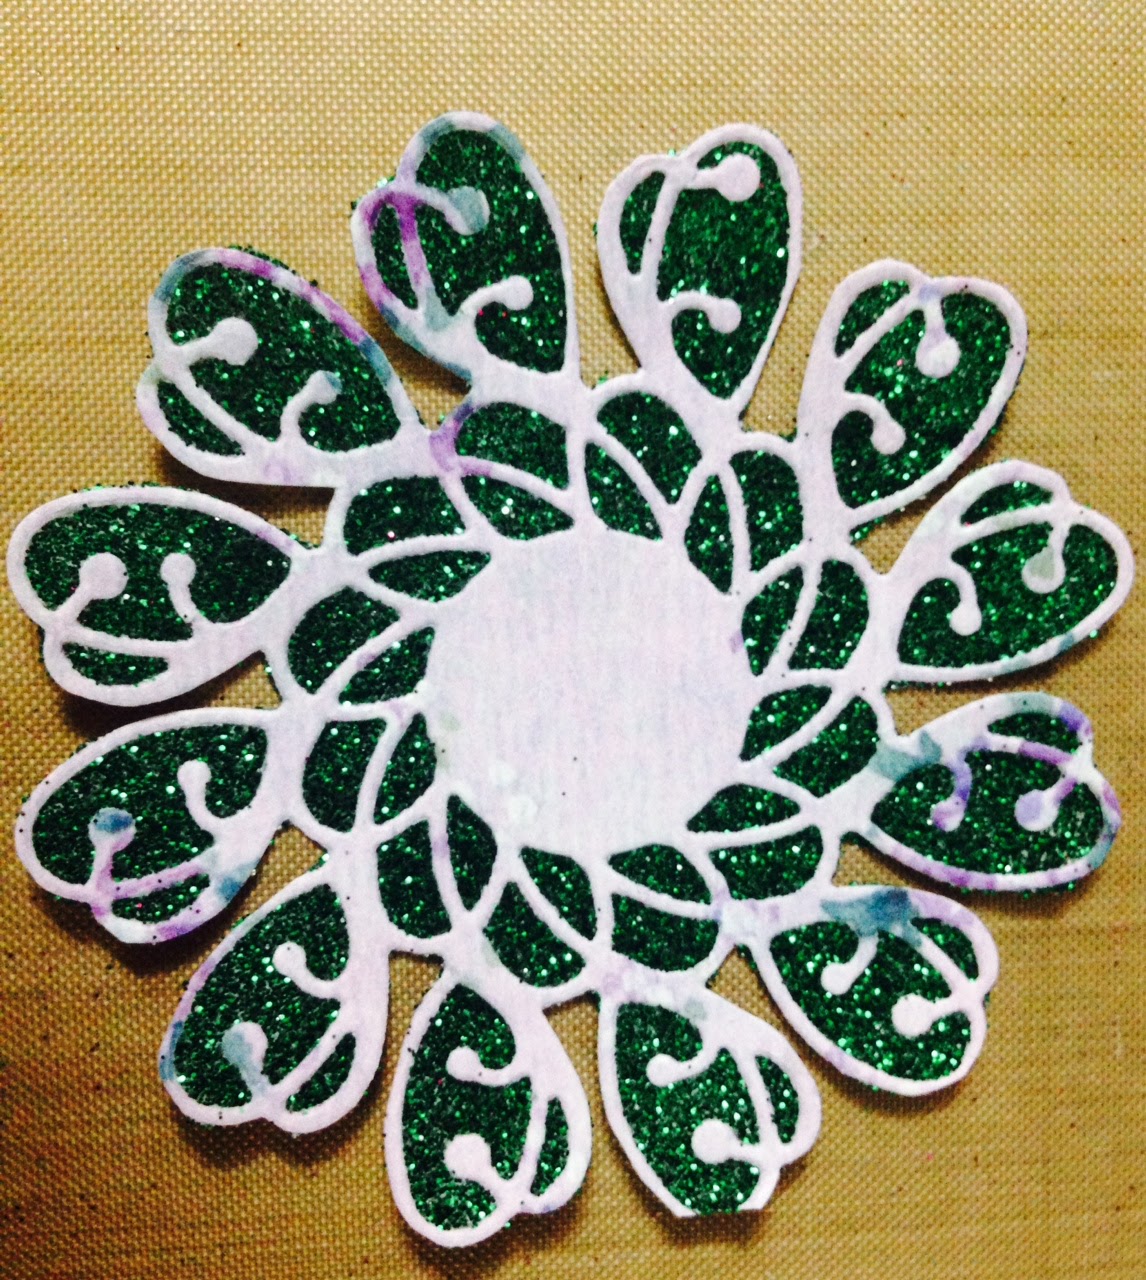
Our superfine glitter can also be used on the sticker sheets available at our store. Here's another simple pictorial on using our glitter+sticker sheet
Materials needed-
A4 sticker sheet
pattern paper/plain card stock
dies/punches (i have used memory box-delia butterfly, whimsy circle and quinn flourish, cheery lynn doily)
1. Die cut your pattern paper or CS. peel off the matte backing of the sticker sheet to reveal the sticky side. place your die cut on this and press it down well.
2. Pour the glitter over the die cut and rub with even pressure all over. (sorry i don't have a pic of this step!)
3. shake off the excess glitter and fussy cut your shape. this is what you'll end up with. Pretty isn't it?! :)
I tried the same method with several shapes
And finally here is what i made with allll my lovely glittered die cuts! :)
I wanted the die cut to be the focus and hence haven't done anything except a little sentiment from my Justrite set :)
Thats it from me today. Don't forget to take part in our challenge this month and shine with your crafting! :)


.jpg)


Oh my my Pratiksha.........so much to do with glitter!
ReplyDeleteSo much more to do with glitter!!! Fantastic post Pratiksha!!
ReplyDeleteVery beautiful !!
ReplyDelete